I have watched a lab technician try to force a 13 mm filter disc into a 4 mm autosampler vial neck and wonder why the membrane folded in half and the injection volume dropped by 40%. That was a Tuesday. By Thursday we had a method deviation, a re-run, and a very annoyed QC manager. The filter was fine. The dimension was wrong. This guide is about that exact problem: matching PTFE membrane filter dimensions to the physical reality of your autosampler or inlet, using numbers you can check against your own hardware.
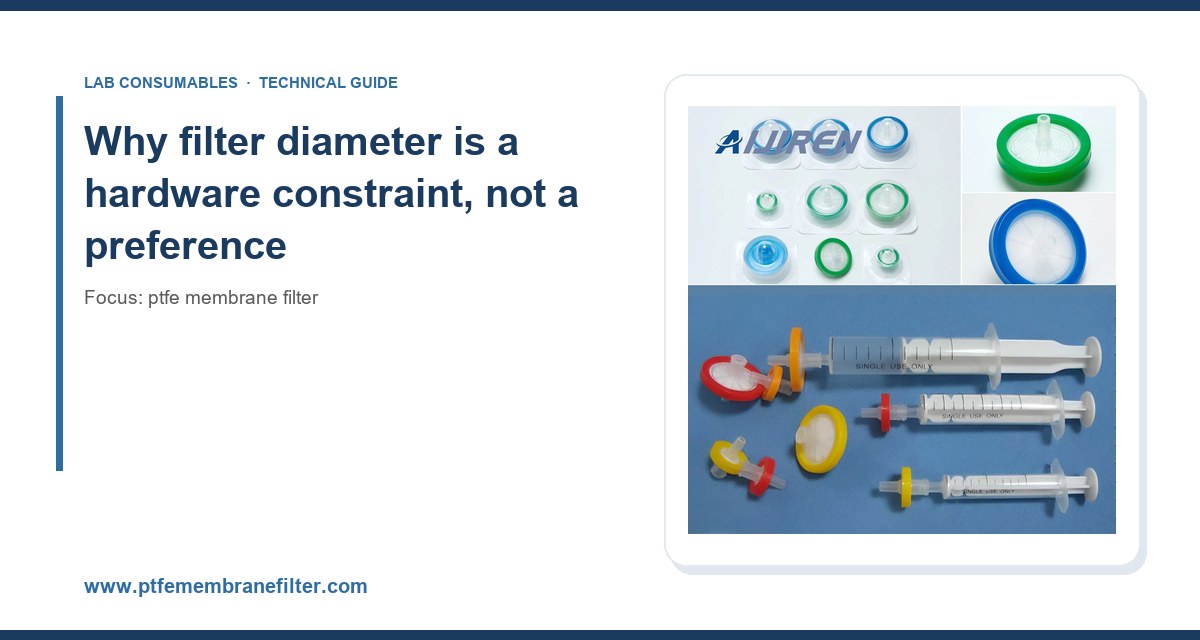
A syringe filter is a mechanical assembly: housing, membrane, support, inlet and outlet ports. The membrane diameter sets the effective filtration area. The housing diameter sets whether the thing physically fits where you want to put it. These are separate variables and vendors conflate them constantly.
On a 13 mm syringe filter, the membrane itself is typically 9 to 10 mm in diameter, giving an effective area around 0.45 to 0.65 cm². On a 25 mm filter, the membrane is roughly 20 mm, effective area near 2.5 to 3.1 cm². On a 33 mm filter you get about 4.5 cm². The housing outside diameter is what matters for fit: a 13 mm filter measures about 13.5 to 14.5 mm across the barrel depending on the manufacturer’s overmolding.
Now look at your autosampler. A standard 2 mL vial (12 x 32 mm, 9 mm screw or 11 mm crimp neck) has an internal diameter of roughly 11.6 mm at the shoulder and about 6.5 mm at the neck opening. If you are dropping a filter into the vial to filter in place, a 13 mm housing will not enter the neck. It will sit on the shoulder, and if you then push, you deform the housing and bypass the membrane seal. That is a leak path, and it is invisible until your recovery data goes sideways.
The three fit dimensions that actually matter
- Housing outside diameter: must clear the narrowest point of the path. For a 9 mm neck vial, that is around 6.5 mm. For a 4 mm micro-vial insert, it is under 3 mm.
- Inlet/outlet port geometry: luer slip male, luer lock, or a blunt 1/16 inch barb. Luer slip is the default for 13 and 25 mm. Luer lock adds about 2 mm to overall length and needs a matching syringe.
- Dead volume: the liquid trapped in the outlet port and membrane support after filtration. A 13 mm filter holds 15 to 25 µL. A 25 mm holds 40 to 70 µL. If your injection volume is 5 µL, a 25 mm filter just ate your sample.
I have a rule I use in training: the filter dead volume should never exceed 10% of the total sample volume you plan to recover. For a 1 mL prep, a 25 mm filter at 60 µL dead volume is 6%, fine. For a 250 µL prep, that same filter is 24%, and you have lost a quarter of your sample to the housing. Use a 13 mm.
Matching filter format to autosampler vial size
Autosamplers are not generic. The vial geometry drives everything. Here is the decision table I keep taped inside a cabinet door.
Vial-to-filter compatibility checklist
- 2 mL standard vial (12 x 32 mm, 9 mm neck): use a 13 mm syringe filter with luer slip, or a 4 mm filter if filtering directly into the vial. Effective membrane area 0.45 to 0.65 cm². Dead volume target under 25 µL.
- 2 mL vial with 250 µL insert: use a 4 mm filter or a 13 mm filter into a separate tube first. The insert bore is about 4.6 mm internal, so a 13 mm housing will not enter. If you must filter in place, pre-filter into a vial insert using a 4 mm housing.
- 4 mm micro-vial (32 x 11.6 mm, 300 µL): 4 mm filter only. Housing OD under 3.2 mm. Anything larger will not seat.
- COD vial (16 x 100 mm, 10 mL): 25 mm or 33 mm filter. Neck ID is about 13 mm, so a 13 mm housing fits loosely but a 25 mm does not enter. Filter into a separate vessel or use a 13 mm with a syringe and transfer.
- Headspace vial (20 mL, 18 mm crimp): 25 mm filter is fine; the neck is wide enough. Watch for septum coring if you filter through the septum, which you should not do.
The 2 mL vial is the workhorse and the source of most dimension errors. People buy 25 mm filters because they are cheaper per unit, then discover the housing does not clear the neck and the filter sits crooked. A crooked filter on a vial shoulder is a bypass channel. A bypass channel means particles reach the column. Particles reach the column means a pressure spike and a very expensive conversation with your chromatography vendor.
When to filter in place versus filter to a separate vessel
Filter-in-place (drop a filter into the vial, draw sample through it with the autosampler needle) only works if the autosampler needle can reach the filter outlet without piercing the membrane from the wrong side. Most autosamplers have a needle that descends to a fixed depth. If your filter housing sits higher than that depth, the needle never reaches the filtrate. Check your needle depth against the filter height. On an Agilent 1260 autosampler, the needle can typically reach within 1 mm of the vial bottom. A 13 mm filter sitting on the shoulder leaves the outlet about 8 mm above the bottom, which is often too high. Filter to a separate vessel instead.
Filter-to-vessel is slower but predictable. Use a 13 mm filter and a 1 mL or 3 mL syringe, push into a clean COD vial or a 2 mL vial, cap, and load. The tradeoff is throughput: about 20 to 30 seconds per sample versus 5 seconds for in-place. For a 96-sample batch, that is 30 minutes of extra labor. Budget for it.
Inlet-side matching: GC liners, LC injection ports, and filter placement
On the GC side, the “filter” question is different. You are not putting a syringe filter into a GC inlet. You are deciding whether to filter the sample before it reaches the autosampler, and how the filter outlet aligns with the inlet liner. A 13 mm filter with a luer tip delivers into a 2 mL vial, not into a liner. The liner is downstream. What matters is that the filtered sample is particle-free to the level the liner can tolerate.
GC inlet liners with glass wool or a sintered frit will trap particles down to roughly 10 to 20 µm. A 0.45 µm PTFE membrane is overkill for most GC work and can strip semi-volatiles if the membrane is not properly conditioned. A 0.2 µm membrane is worse. For GC, I usually recommend 0.45 µm only when the sample is visibly dirty, and a 1.0 µm or 5.0 µm filter when the matrix is clean but you want protection. Match the pore size to the liner frit, not to the column.
On the LC side, the injection port and the column frit are the constraints. Column frits are typically 0.5 to 2 µm porosity. A 0.45 µm membrane protects a 2 µm frit with margin. A 0.2 µm membrane is the right call for UHPLC columns with sub-2 µm particles, where a single particle can bridge the frit and cause a pressure spike. I have seen a 0.2 µm filter prevent a 400 bar pressure rise on a 1.8 µm column that a 0.45 µm filter let through. The extra cost per filter was about 12 cents. The column was $600.
Pore size selection by technique
- HPLC with 3 to 5 µm particles: 0.45 µm PTFE. Standard. No argument.
- UHPLC with sub-2 µm particles: 0.2 µm PTFE. Non-negotiable if you value your column.
- GC with packed or standard capillary columns: 0.45 µm if dirty, 1.0 µm if clean. 0.2 µm only for trace analysis where particulates are the known problem.
- IC and ion chromatography: 0.2 µm, and confirm the membrane is surfactant-free. PTFE is naturally hydrophobic; some filters are wetted with a surfactant that leaches into the eluent.
- Dissolution and content uniformity: 0.45 µm, and verify no analyte adsorption. PTFE adsorbs hydrophobic compounds; pre-wet with methanol or acetonitrile if your analyte is nonpolar.
For reference on column and consumable compatibility, the Agilent chromatography consumables and columns documentation lists recommended filter porosities by column family. Thermo Fisher chromatography and sample handling publishes similar guidance. Cross-check your column vendor’s spec sheet before you standardize on a pore size.
Housing material, pressure rating, and burst failure
PTFE membrane is chemically inert. The housing is not. Most 13 mm and 25 mm syringe filters use polypropylene (PP) or acrylic housings. PP is compatible with most HPLC solvents, including acetonitrile, methanol, and THF, up to about 60°C. Acrylic is cheaper but dissolves in acetone and swells in DMSO. If your method uses DMSO, specify PP.
Pressure rating matters more than people think. A 13 mm PP filter is rated to about 5 to 7 bar (70 to 100 psi) burst. A 25 mm is similar. A 33 mm can go to 10 bar. If you are pushing a viscous sample through a 0.2 µm membrane with a 10 mL syringe, you can easily exceed 7 bar with thumb pressure. I have popped a 13 mm housing at the seam doing exactly that. The failure mode is a hairline crack at the inlet weld, which leaks slowly and looks like a syringe problem. Use a syringe with a pressure gauge, or switch to a 25 mm filter for viscous matrices, or dilute the sample.
Temperature and chemical limits
- PP housing: continuous service to 60°C, short excursions to 80°C. Autoclave at 121°C for 15 minutes is fine for most PP filters, but check the manufacturer’s sterilization claim.
- PTFE membrane: continuous to 260°C, but the housing limits the assembly. Do not confuse membrane rating with assembly rating.
- Acrylic housing: avoid ketones, esters, and DMSO. Maximum 50°C.
- PES and nylon membranes: not PTFE, but if you are comparing, nylon adsorbs proteins and PES is not solvent-compatible with many HPLC mobile phases. PTFE is the default for a reason.
If you are filtering a sample at 4°C in a cold room, the viscosity of your mobile phase goes up by roughly 1.5 to 2x compared to 25°C. That doubles the pressure required to push through a 0.2 µm membrane. A filter that works fine at bench temperature can burst in the cold room. Warm the sample to room temperature before filtration, or use a larger diameter filter to reduce pressure per unit area.
Sterility, extractables, and the regulated-method angle
If your method is regulated (EPA SW-846, USP, AOAC), the filter is part of the method, not an accessory. Changing filter diameter changes the effective filtration area, which changes the volume of sample lost to the membrane and housing. That changes your recovery, which changes your result. I have seen a method validated with a 25 mm filter fail an audit because the lab switched to 13 mm to save money. The recovery dropped 8% and nobody noticed until the proficiency test came back.
The U.S. EPA SW-846 test methods specify filtration in several procedures (for example, Method 3510 for separatory funnel extraction and Method 8330 for explosives). Where a filter is specified, the diameter and pore size are part of the procedure. Do not substitute without revalidation. For non-regulated work, substitute freely, but document the change in your SOP.
Extractables are the other regulated concern. PP housings can leach oligomers and antioxidants into your filtrate. At 0.2 µm and 13 mm, the extractable load is small (typically under 1 µg per filter for PP), but for trace analysis at ppb levels, it matters. Pre-rinse the filter with 1 to 2 mL of your mobile phase before collecting the filtrate. I do this on every filter, even for non-trace work, because it costs 10 seconds and eliminates a whole class of ghost peaks.
Filter conditioning protocol
- Pre-wet the membrane with 0.5 mL of methanol or acetonitrile if your sample is aqueous and the analyte is hydrophobic. PTFE is hydrophobic and will not wet with water alone.
- Rinse with 1 to 2 mL of mobile phase or sample solvent. Discard the rinse.
- Filter the sample. Discard the first 3 to 5 drops (about 100 to 200 µL) to clear dead volume and any loosened particles.
- Collect the filtrate in a clean vessel. Cap immediately if the solvent is volatile.
For more detail on membrane chemistry and conditioning, the Restek technical resources have good application notes on filter compatibility with common mobile phases. The PTFE membrane filter product pages on this site list housing materials and pressure ratings per format.
Torque, connections, and the mechanical side of filtration
Syringe filter connections are friction-fit (luer slip) or threaded (luer lock). Luer slip is faster but pops off under pressure above about 3 bar. Luer lock is slower but holds to the filter’s burst rating. If you are filtering more than 5 mL through a 0.2 µm membrane, use luer lock. The extra 2 seconds per sample is cheaper than a filter that separates from the syringe mid-push and sprays sample across the bench.
For threaded connections, hand-tighten only. The torque spec on a luer lock is usually 0.2 to 0.4 N·m. That is finger-tight plus a quarter turn. Over-torque cracks the housing at the thread root. I have a drawer of cracked luer lock filters to prove it. If you need a torque wrench for a syringe filter, you are doing it wrong.
On the autosampler side, vial caps are the torque-sensitive part. A 9 mm screw cap on a 2 mL vial should be tightened to about 0.5 to 0.8 N·m. Too loose and the septum leaks; too tight and the septum cores on needle entry. Both cause injection volume errors. The filter does not change this, but a filter that leaves the vial overfilled (because you filtered in place and displaced volume) can cause the cap to not seat. Leave 10 to 15% headspace in the vial after filtration.
Troubleshooting checklist: when the filter is not the problem
Before you blame the membrane, check these in order. I have solved more “filter failures” with this list than with any analytical method.
- Pressure spike on injection: check for particles bypassing the filter. A crooked filter, a cracked housing, or a filter seated on the vial shoulder instead of in the neck. Inspect the filter after use. A bypass channel shows as an uneven wet patch on the membrane.
- Low recovery: check dead volume. A 25 mm filter on a 250 µL sample loses 24% to the housing. Switch to 13 mm or 4 mm.
- Ghost peaks: check extractables. Pre-rinse the filter with mobile phase. If peaks persist, switch to a different housing material (PP instead of acrylic) or a different membrane lot.
- Membrane wetting failure: PTFE will not wet with water. Pre-wet with methanol or acetonitrile. If the sample is aqueous and you cannot use organic solvent, use a hydrophilic PTFE (often called PTFE with a hydrophilic coating) or a different membrane chemistry.
- Filter pops off the syringe: pressure exceeds luer slip rating. Switch to luer lock or a larger diameter filter. Dilute viscous samples.
- Needle cannot reach filtrate: filter depth exceeds autosampler needle depth. Filter to a separate vessel.
- Septum coring: cap torque too high, or needle gauge too large for the septum. Check cap torque and needle spec.
- Inconsistent injection volumes: vial overfilled or underfilled. Check headspace after filtration.
Recommendation: the dimensions I specify by default
For a standard HPLC method with a 2 mL vial, 3 to 5 µm column, and aqueous/organic mobile phase, I specify a 13 mm PTFE syringe filter, 0.45 µm pore, PP housing, luer slip, dead volume under 25 µL. That covers about 80% of routine work. For UHPLC with sub-2 µm particles, I switch to 0.2 µm and keep everything else the same. For micro-volume work (under 500 µL sample), I use a 4 mm filter or filter into a vial insert to preserve volume.
For GC, I specify a 13 mm, 0.45 µm filter only when the sample is visibly particulate, and a 1.0 µm filter for clean matrices. I do not use 0.2 µm for GC unless the method demands it, because the pressure required to push semi-volatile samples through a 0.2 µm membrane at room temperature is high enough to risk burst on a 13 mm housing.
For COD and other large-volume colorimetric work, I use a 25 mm, 0.45 µm filter and accept the higher dead volume because the sample volume is 10 mL or more and the dead volume is under 1%.
The single number that prevents most failures: housing outside diameter must be at least 1 mm smaller than the narrowest point of the path it must pass through. For a 9 mm neck vial, that means a housing under 6.5 mm. For a 4 mm insert, under 3.2 mm. Measure your path, then buy the filter. Not the other way around.
Takeaway: the membrane chemistry is rarely the variable that breaks a method. The dimension is. Match the housing OD to the vial neck, match the dead volume to the sample volume (under 10%), match the pore size to the column frit (0.45 µm for 3 to 5 µm particles, 0.2 µm for sub-2 µm), and match the connection type to the pressure (luer lock above 3 bar). Get those four numbers right and the filter stops being a troubleshooting topic and goes back to being a consumable.
References & further reading
Related resources from our lab consumables network:
- Ptfe Membrane Filter at ptfemembranefilter.com
- Cod Vial at codvial.com
- Vial Insert at hplcinsert.com
- 2Ml Vial at 2mlsamplevial.com
External references and standards: